Digital Photo Editing
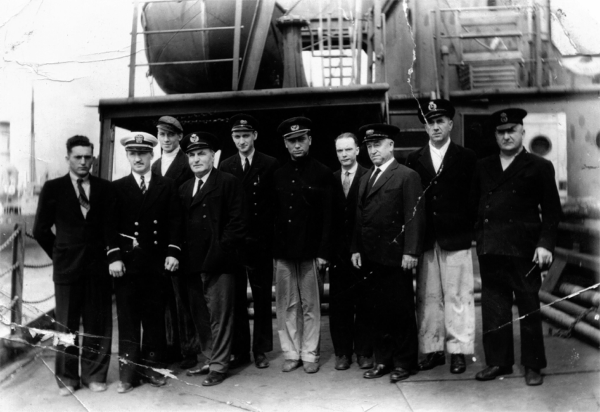
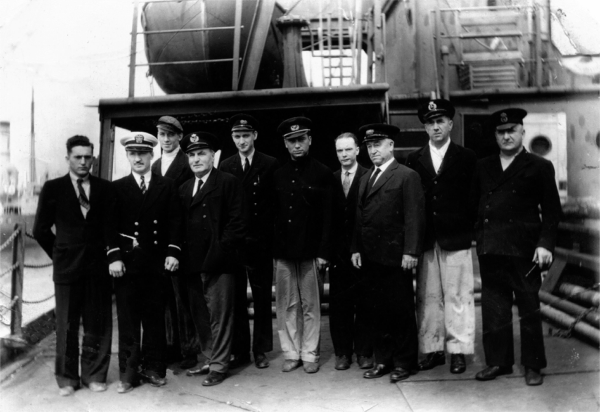
The following pair of photographs is an example of the results that can be produced by using digital editing software to repair a damaged photograph. The photograph was scanned on a good quality scanner at 600 dpi grayscale. It was opened in the photo editing application and magnified to a setting of about 400%. At this point the process involves patience, time, and attention to detail. Most of this repair was accomplished using the clone function. Using the tool, you sample an area that is as close as possible in color and shading to the area that is damaged or missing and 'clone' the missing pixels into place. The sample is usually taken from an area adjacent to, or very near, the damaged or missing area. Once the pixels are in place, it is fairly easy to see if the replacement is close enough to make an acceptable repair. If the replacement is not acceptable, click undo and try, try again.
It really doesn't matter which application you use as long as it works well, is stable, and is easy for you to use. I recommend that you make constant incremental saves as you progress in your work. I usually assign an ascending number after the title so I begin to build a version history of my work. I do this in case the computer or the application becomes unstable or I make changes that I later realize I wish I could redo. If I have created a version library of the file, I can choose a version before I applied that change and continue my work from that previous progress point. I hope these tips and tricks will be helpful to you if you currently edit photographs, or if you do not, encourages you to give digital photo editing and restoration a try.
Before Restoration Process

After Restoration Process
